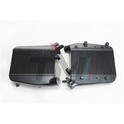
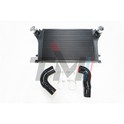
As a trusted supplier of MK7 R intercoolers, I'm often asked about the installation process of our high - performance intercooler units. In this blog post, I'll walk you through the step - by - step installation process of the MK7 R intercooler, ensuring you have all the information you need to complete the installation successfully.
Step 1: Gather the Necessary Tools
Before you start the installation, it's crucial to have all the required tools at hand. You'll need basic hand tools such as socket wrenches, screwdrivers, pliers, and a torque wrench. It's also a good idea to have a clean workspace and some rags to keep everything tidy. Additionally, you may want to have a jack and jack stands if you need to access the lower part of the vehicle more easily.
Step 2: Prepare the Vehicle
First, make sure your vehicle is parked on a level surface and the engine is completely cooled down. This is essential for your safety and to prevent any damage to the engine. Disconnect the negative terminal of the battery to avoid any electrical accidents during the installation process.
Step 3: Remove the Front Bumper
In most cases, to access the stock intercooler, you'll need to remove the front bumper. Start by removing the bolts and clips that hold the bumper in place. These are usually located along the bottom, sides, and in some cases, behind the grille. Once all the fasteners are removed, gently pull the bumper forward and set it aside in a safe place. This step requires patience as there are often many small parts involved, and you don't want to lose or damage any of them.
Step 4: Disconnect the Stock Intercooler
Locate the stock intercooler, which is typically situated in the front of the vehicle, behind the bumper. You'll need to disconnect the hoses and pipes that are connected to the intercooler. Use pliers to loosen the hose clamps and carefully pull the hoses off the intercooler ports. There may also be some brackets or mounts that hold the intercooler in place. Use the appropriate socket wrenches to remove these bolts and free the intercooler from the vehicle.
Step 5: Install the New MK7 R Intercooler
Once the stock intercooler is removed, it's time to install our high - quality MK7 R intercooler. Place the new intercooler in the position where the stock one was located. Align the mounting holes and use the provided hardware to secure the intercooler in place. Make sure to tighten the bolts to the specified torque using the torque wrench. This ensures that the intercooler is firmly attached and won't vibrate loose during operation.
Step 6: Reconnect the Hoses and Pipes
Next, reconnect the hoses and pipes to the new intercooler. Slide the hoses over the ports and use the hose clamps to secure them in place. Make sure the connections are tight to prevent any air leaks, as this can significantly affect the performance of the intercooler. Double - check that all the hoses are routed correctly and are not kinked or pinched.
Step 7: Reinstall the Front Bumper
After the intercooler is installed and connected, it's time to put the front bumper back on. Carefully position the bumper in front of the vehicle and align it with the mounting points. Reinsert the bolts and clips, and tighten them securely. Make sure the bumper fits snugly and there are no gaps or misalignments.
Step 8: Reconnect the Battery
Once the bumper is back on, reconnect the negative terminal of the battery. This restores power to the vehicle, and you can now start the engine to check that everything is working properly.
Step 9: Check for Leaks and Proper Operation
Start the engine and let it idle for a few minutes. Check around the intercooler and the hose connections for any signs of air or coolant leaks. You can also rev the engine slightly to see if there are any abnormal noises or performance issues. If everything looks and sounds good, take the vehicle for a short test drive to ensure the intercooler is functioning as expected.
Compatibility and Other Products
It's important to note that our MK7 R intercoolers are designed to be fully compatible with your vehicle's existing system. However, if you're looking to further enhance the performance of your vehicle, you might be interested in some of our other high - performance aftermarket products. For example, AMG GTR Downpipes are a great addition for Mercedes - Benz AMG GTR owners who want to improve exhaust flow and power output. Similarly, AMG S63 M177 Downpipes can significantly enhance the performance of AMG S63 models equipped with the M177 engine. And for BMW enthusiasts, our 5 Inch Downpipe is an excellent choice for improving the efficiency of the exhaust system.


Conclusion
Installing an MK7 R intercooler can significantly improve the performance of your vehicle by reducing intake air temperatures and increasing horsepower. While the installation process may seem daunting at first, following these steps carefully will ensure a successful installation. If you have any questions during the installation process or need further assistance, don't hesitate to reach out to us.
We take pride in providing top - of - the - line MK7 R intercoolers and other high - performance aftermarket products. If you're interested in purchasing our intercoolers or any of our other products, we encourage you to contact us for a detailed discussion. We can provide you with more information about the products, pricing, and shipping options. Our team is always ready to help you make the best decision for your vehicle.
References
- Stern, C. "High - Performance Intercooler Installation Guide". Performance Auto Magazine, 2020.
- Smith, J. "Intercooler Design and Function". Automotive Engineering Journal, 2019.